A water stain on your ceiling is easy to spot. Finding where it came from is the hard part. Water enters the roof structure at one point, then travels — sometimes metres away — along rafters, battens, and ceiling insulation before it drips somewhere visible. The stain above your dining table may have nothing to do with the roof directly above it.
This step-by-step guide helps you systematically narrow down the source of a roof leak, understand what you can investigate yourself, and know clearly when you need a professional roof repair team.
Early Signs of a Roof Leak
Roof leaks rarely announce themselves with an obvious drip. More often, you notice one of these early indicators first:
- Yellow or brown water stains on ceilings or walls — often with a distinct ring or tide-mark pattern
- Damp or musty odours from ceiling spaces, particularly after rain
- Peeling or bubbling paint on interior ceiling surfaces
- Visible mould or mildew growth on ceilings or in the corners of rooms near the roofline
- Sagging or soft spots in the ceiling plasterboard
- Visible drips during or immediately after heavy rainfall
Rule Out Other Water Sources First
Before assuming a roof leak, consider other possibilities: hot water pipes in the ceiling cavity, air conditioning condensate drain lines, bathroom exhaust fans that vent into the ceiling space rather than outside, or flashing failures around skylights. A ceiling stain that appears regardless of rainfall points to a plumbing issue, not a roof issue.
Step 1: Inspect the Roof Cavity
If you have roof cavity access (most homes do, via a manhole in a hallway or bedroom ceiling), this is the most useful place to start. Wait for daylight and ideally inspect during or just after rainfall if conditions permit safe access.
What to look for: water stains on roof sheathing or sarking, wet or discoloured insulation batts, water trails running along rafters or battens (water follows timber before dripping), daylight visible through roof sheeting (indicates a significant gap), and musty odours or visible mould growth on timber surfaces.
Mark or photograph any wet or stained areas and trace them toward the roof surface above. The highest point where moisture is visible is closest to the actual entry point.
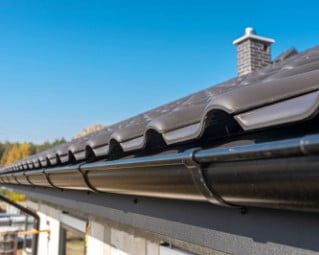
Step 2: Examine the Roof Surface
Using binoculars from the ground, or from a ladder at gutter level (don't go on the roof without proper safety equipment), look for:
- Cracked, broken, or visibly slipped tiles — any tile that doesn't sit flush with its neighbours
- Lifted or corroded flashing at any roof penetration — chimney bases, skylight surrounds, vent pipes, wall junctions
- Cracked or missing mortar pointing along ridge capping and hip tiles
- Corroded, cracked, or debris-blocked roof valley iron
- Visible gaps where roofing material meets a wall or parapet
- Damaged or missing roofing screws on metal roofs
Step 3: The Hose Test
If visual inspection doesn't locate the source, a controlled hose test can simulate rainfall to isolate the leak. This requires two people — one on the roof with a hose, one inside watching for water entry.
Start at the lowest point of the roof and work upward systematically. Soak each section thoroughly for 2–3 minutes before moving higher. When the person inside observes water entry, you've narrowed the location to the section being soaked at that moment. Then work that section more specifically to identify the precise entry point.
This method works well for clear, straightforward leaks. For intermittent leaks that only appear during specific weather conditions (high wind, driven rain at a certain angle), the hose test may not replicate the conditions that cause ingress — in which case professional detection equipment is needed.
Temporary Measures While You Wait for Repair
Once you've identified or approximated the source, temporary measures can reduce damage while a proper repair is arranged:
- Apply roofing cement or silicone sealant to a clearly identified crack or open join — clean the surface first and apply generously; this is a short-term measure only
- Tarp over the affected area if safe and accessible — extend well past the suspected entry point and secure firmly
- Inside, relieve pressure from any ceiling that is actively holding water — pierce a small hole at the lowest point to direct flow into a bucket rather than risk a plasterboard collapse
When to Call a Professional
Get a licensed roofer involved when: you cannot locate the source after a thorough inspection; the leak is intermittent and weather-dependent; there is any sign of structural damage (sagging roof, widespread staining, mould throughout the ceiling cavity); the repair is on a two-storey or steeply pitched roof; or the likely cause involves flashing, valley iron, or ridge capping — all of which require licensed trades to repair correctly.
Professional roofers use diagnostic tools — moisture meters, thermal imaging, and electronic detection — to locate leaks that visual inspection misses. Read more about advanced leak detection technologies to understand what a professional inspection involves.
If your roof has visible deterioration beyond just the leak — moss growth, cracked pointing, ageing tiles — the inspection may reveal that a full roof restoration is the more cost-effective solution than ongoing patch repairs.
Free Inspection
Found a Leak? Let Us Find the Source.
We diagnose and quote before we start any work. If we find the problem and it's simpler than expected, we'll tell you — no pressure to proceed with more work than you need.
Tags
Central Coast Roofing
Licensed roofing contractors serving Gosford, Wyong, Terrigal and all of the Central Coast NSW. Over a decade of residential and commercial roofing experience.